
Bakers! Welcome back to my Baking Basics series.
This is a very long post. Pie crust makes me chatty.
It’s summer. The days are longer and a bounty of fruit is at our fingertips. And this means you have time to finally nail homemade pies. Today I’m going to teach you everything you need to know about making the perfect buttery flaky pie crust. This is the one and only pie crust recipe I use. It’s been passed down through generations. Stands the test of time. Old-fashioned, yet never out of style. Wins my heart every single time.

There is nothing more satisfying than making a pie completely from scratch. From the golden crust to the juicy filling and everything in between. Pies are so damn tasty for one reason: they’re time consuming. This shouldn’t scare you! It should intrigue you. Because if you can bake an exceptional homemade pie, congratulations. You’re a talented baker.
Let me help you get there.
As the base holding all of the pie’s contents, pie crust’s flavor is in every single bite. Start with a solid crust and you’re that much closer to pie-fection. !! Today we’re going to explore my pie crust recipe, preparation tips, how-to’s, and troubleshooting.
About The Ingredients
This crust is made with a few simple ingredients: flour, salt, cold water, and fat.
Start with quality flour. Did you know that not all all-purpose flours are created the same? King Arthur Unbleached All-Purpose Flour (adoring fan girl. they do not know I exist.) is my go-to for not only pie crust, but for pretty much ALL baked goods. Now, I admit. Sometimes I buy cheaper flours that are on sale, but in general– KA flour is my top choice. Why? Its high protein level: “At 11.7-percent protein, it tops ordinary American all-purpose flours by nearly 2 percentage points.” (source)
What does this mean? Baked goods rise higher and stay fresh longer.
A gluten free pie crust, you ask? I’ve never made one. Do you have a solid recipe for one?

Next up in my pie dough: salt. An obvious ingredient. Brings out the flavor. Pie crust shouldn’t be sweet.
Now, the final ingredient(s). They’re highly debatable. There are strong opinions out there for butter crust vs. shortening crust vs. lard crust. (I rarely use lard because it’s not as easy to come by for most people– though it makes a TASTY crust.) If you despise shortening, my pie crust recipe isn’t for you. If you want a crust recipe that stands the test of time, using good old shortening just as mom did– read on.

Why I Use Shortening and Butter
Not all fats are created equal. Why shortening? With its high melting point, shortening aids in creating flakiness. Flaky, tender, melt-in-your mouth crust. Why butter? Butter imparts unparalleled, impeccable flavor. Nothing beats butter. I use both to create a crust that is full of tender flakes and rich in buttery flavor.
A Tasty Experiment
I recently performed an experiment. The tastiest kind, of course. I prepared an all-butter version to compare to my beloved butter/shortening crust. One thing was clear: the all-butter crust created a lighter textured crust with more defined flakes. This is due to the butter’s water content. As the crust bakes, the butter’s water converts to steam, creating light flakes. Get it? Because of all this butter, I found that the all-butter crust didn’t have a perfectly neat-edged crust. Crimping the edges of the crust was a little pointless.
The all-butter crust tasted like pure butter. The butter/shortening crust (1) was just as flaky and tender in my opinion (and my taste tester’s, thanks Kevin) and (2) tasted buttery and like pie crust (think: diner style cherry pie). Both crusts were great. But the butter/shortening won in terms of texture, flavor, and appearance. This KA Flour blog post had similar results (great read if you’re a pie nerd like I am!).
Use Cold Fat
Why the emphasis on temperature? Keeping your pie dough as cold as possible helps prevent the fat from melting. If the butter melts inside the dough before baking, you lose the flakiness. When the lumps of fat melt in the oven as the pie bakes, their steam helps to separate the crust into multiple flaky layers– as explained above. Warm fats will lend a hard, crunchy, greasy crust instead of a nice tender flaky crust.
I keep some of my butter in the freezer and transfer it to the refrigerator a few hours before beginning the crust. This way it is part frozen and very, very cold. For shortening? Just keep it in the refrigerator.

Tips + Recipe
(Print-friendly recipe below!)
Start with flour and salt in a large bowl. Add the cold fats. Use a pastry cutter (or two forks) to cut in the fats. A pastry cutter is ideal. And the easiest. Cut in the fats until the mixture resembles coarse meal. You should have some larger pieces of butter and shortening when you’re done. That is OK.

Next: ice water. Measure 1/2 cup (120ml) of water in a cup. Add ice. Stir it around. From that, measure 1/2 cup of water (since the ice has melted a bit!). Drizzle the cold water in, 1 Tablespoon (15ml) at a time, and stir with a rubber spatula or wooden spoon after every Tablespoon (15ml) added. Do not add any more water than you need to. Stop adding water when the dough begins to form large clumps. I always use between 1/3 cup (75ml) and 1/2 cup (120ml) of water.
Stop adding water when the dough begins to clump just like this:

If too much water is added, the pie dough will require more flour and thus become tough. If too little water is added, you’ll notice the dough is dry and crumbly when you try to roll it out and handle it.
Vodka?
Speaking of liquids. Have you heard of adding cold vodka to pie dough? It comes as no surprise to me that the geniuses at Cook’s Illustrated rave about it. They say that half of the pie dough’s moisture should come from vodka, which is 40% pure alcohol. This alcohol doesn’t promote gluten formation, helping the crust stay flaky and tender. Basically, it is a BLESSING to those of us who accidentally overwork pie dough.
(If you want to try using vodka– use 1/4 cup cold vodka and 1/4 cup ice cold water in the below recipe. OR try out the Cook’s Illustrated recipe. Note: their recipe only makes one pie crust and my recipe below makes two.)

Back to my recipe. Transfer the dough to a floured work surface. Using floured hands, fold the dough into itself until the flour is fully incorporated into the fats. Form it into a ball. The dough should come together easily and should not feel overly sticky.
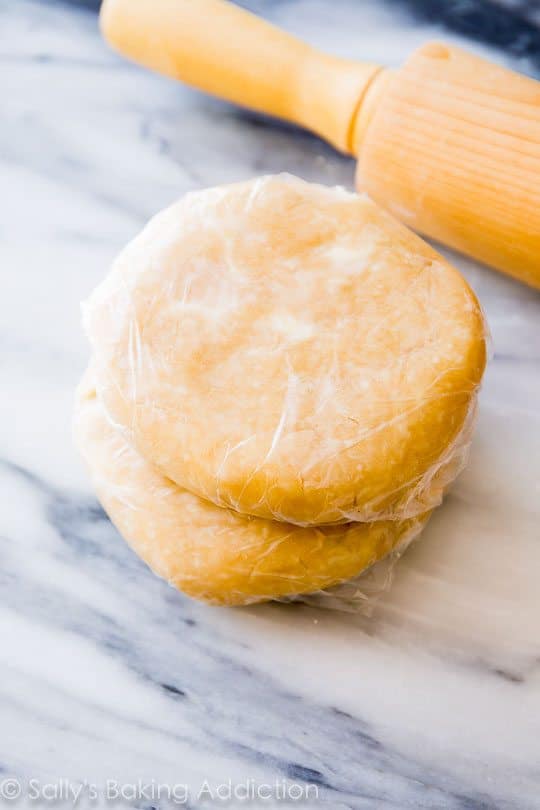
Cut the dough in half. Flatten each half into 1-inch thick discs using your hands. Wrap each tightly in plastic wrap. Refrigerate for at least 2 hours or up to 5 days. Or freeze!

Specks or swirls of fat = good!
After the dough has chilled, start preparing your pie.
Roll out the crust. Always use gentle force. You are not mad at the crust. When rolling dough out, always start from the center and work your way out in all directions, turning the dough with your hands as you go.

Turn, roll, turn, roll.

Roll the dough to fit a 9-inch pie dish. I typically roll the dough into a 12-inch circle so that there is enough crust to go up the edges of the dish and so I can trim and flute.
Do NOT be overwhelmed. I made sure to break everything down very easily, so a lot of the text in this recipe is me being as thorough as possible. Be sure to read through additional tips and troubleshooting below. Let me know about your pie adventures!

 PRINT
PRINT
Pie Crust Tips
√ I prefer using a glass pie dish when I make pie. Why? Glass dishes conduct heat evenly, which allows the bottom of the crust to bake thoroughly. Also, you’ll be able to see when the sides and bottom of the crust has browned.
√ Keep everything cold. Cold fats are key, as you now know. On a hot day, you can even measure and chill your flour in the refrigerator before beginning. When taking the pie crust out of the refrigerator to roll out and fill, make sure your pie filling is ready to go. If not, keep the pie crust in the refrigerator until it is.
√ Preheat the oven so that the cold dough will go into a hot oven.
√ If your pie recipe requires pre-baking (crust “blind baking”)– let’s say you’re making a pie with an especially wet filling– use pie weights. Without pie weights, the dough will puff up, then shrink. Pie weights are made from metal or ceramic beads and work to weigh down the crust to prevent the puffing/shrinking. Dried beans can also be used! Whichever you choose, be sure to line the crust with parchment, then fill the empty pie crust with the weights all the way to the top of the pie dish rim prior to baking. More on pie weights.
√ I always, always use a pie crust shield. A shield keeps the crust edge covered, which protects it from browning too quickly or worse– burning. Here is the one I own. Alternatively, you can cover the pie with a piece of aluminum foil. Cut a large circle in the center of the square so the center of the pie is exposed.
√ If your pie recipe requires a pre-baked pie shell, such as banana cream pie, french silk pie, or a tart, here is what to do: prepare the pie crust through step 6. Roll out the chilled pie dough into a 12-inch circle, carefully place the dough into a 9-inch pie dish. Tuck it in with your fingers, making sure it is smooth, then trim and flute the edges. Prick the bottom of the crust all over with a fork, then line the crust with parchment paper and fill with pie weights. Bake at 375°F (190°C) until it begins to color around the edges. (15-20 minutes)
Troubleshooting
√ Prevent a crumbly pie dough. Make sure you use enough water when preparing your pie dough. Too little water will make your dough unworkable. Read more about water above.
√ Prevent a tough baked pie crust. Tough crusts are the result of not enough fat in the crust, as well as overworking the dough. Use the recipe above (plenty of fat) and don’t work the dough too much.
√ Prevent a burnt crust with a pie shield! See above.
Pie Recipes!
Recipes to try using this crust: peach pie (in my cookbook!), cherry pie, chicken pot pie,pumpkin pie, quiche, baked apples, salted pecan pie tarts, apple crumble pie, blueberry peach pie, homemade pop-tarts!, and salted caramel apple pie.
Scoure: sallysbakingaddiction
No comments:
Post a Comment